


Things You’ll Need
-
CitriStrip stripper
-
Chemical resistant gloves
-
Paintbrush
-
Plastic scrapers
-
Mineral spirits
-
Stripping pads
-
Sanding paper
-
Oil-based stain
-
Water-based polyurethane
-
Spray paint
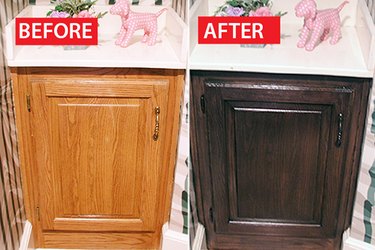 Darker cabinets are more up to date. Image Credit: Debbie Williams
If you were an adult in the late 1980s you might not mind honey oak cabinets and brass handles – you might even still like them. But these days nothing screams "out of date" louder than those cabinets. Many people promote replacing, refacing or painting them, but with the right products and a little extra time, you can refinish otherwise perfectly good oak cabinets into truly beautiful, up-to-date assets for your home.
Video of the Day
Step 1
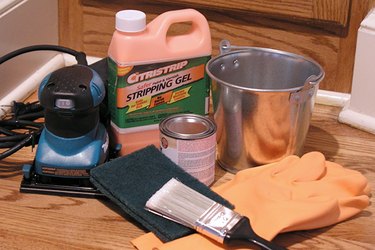 All these supplies are readily available at local home centers. Image Credit: Debbie Williams
Gather supplies needed and protect the surrounding floor by covering with plastic sheeting. (It's a good idea to tape the plastic in place.) Be sure to have plenty of rags available to keep the area clean. Remove the hardware and doors from the cabinets.
Step 2
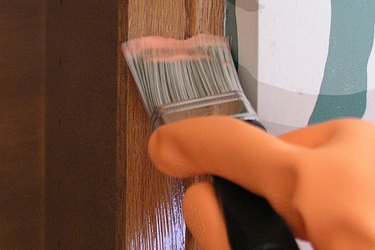 Be careful to paint the stripper only onto the wood. Image Credit: Debbie Williams
Wearing chemically resistant gloves, pour a small amount of stripper into a metal bucket. Paint the stripper onto the wood surface. Brush with the grain and cover the entire area completely. Do the cabinet frames in place first and move the doors to a separate area where you have space to spread out – like a driveway or a garage.
Step 3
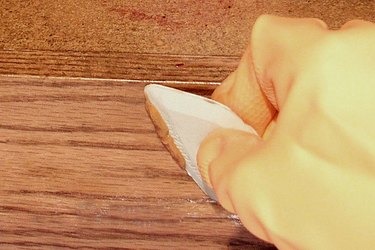 Use a variety of plastic scraper sizes and shapes to fit the contours of the piece you are stripping. Image Credit: Debbie Williams
Let the stripper set for at least 30 minutes. Test an area to see if it lifts and when ready, scrape the stripper and finish off in smooth, full length strokes, wiping the residue off the scraper with rags or onto scrap cardboard pieces.
Step 4
 Stripping pads work like open grained sandpaper. Image Credit: Debbie Williams
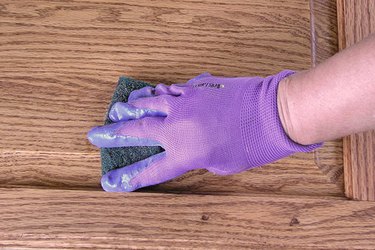
Wipe the surface with a stripping pad to remove residual stripper. Be sure to reach all the crevices and corners. When finished, dampen a cloth with mineral spirits, wipe the entire surface of the cabinet and let dry. If some finish remains, use a second coat of stripper and repeat the process.
Step 5
 Use care not to oversand and change the shape of the profile. Image Credit: Debbie Williams
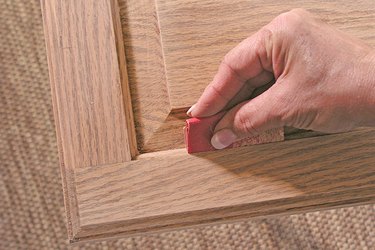
Sand the flat surfaces with a palm sander. Using a folded sheet of fine sandpaper, detail sand the rounded or recessed areas of the cabinet. Wipe all surfaces to remove any dust particles.
Step 6
 Wear gloves to keep from staining your hands. Image Credit: Debbie Williams
Brush the stain of your choice onto the wood, stroking with the grain of the wood. Let it set for a minute and then wipe clean with a dry cloth. Don't let the stain dry on the wood. Repeat the process if you want a darker color. It's a good idea to test your method on the back side of a door to get the desired color before proceeding to the frame and fronts of the doors. Let the final stain dry at least 8 hours before proceeding.
Step 7
 Apply polyurethane in several thin coats. Image Credit: Debbie Williams
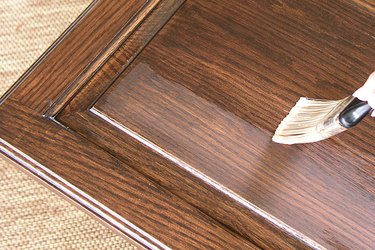
If you are refinishing indoor cabinets, use a water-based polyurethane to reduce your exposure to toxic fumes. Apply one coat, paying particular attention to the corners both inside and outside to prevent drips and runs. Let dry for 2 hours. Lightly sand with fine sandpaper and apply a second coat of the polyurethane. Let dry overnight before re-assembly.
Step 8
 Stand handles on their screws pushed into foam board to paint. Image Credit: Debbie Williams
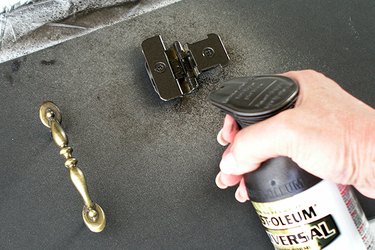
Either replace the old hardware with a new style or spray paint the old hardware a color of your choice. Clean the pieces with mineral spirits and a stiff brush if you choose to paint them.
Step 9
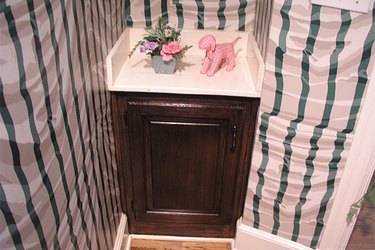 Now, what shall we do with that wallpaper! Image Credit: Debbie Williams
Re-assemble the door hinges and replace the handles and pulls.


